★★★★★
“Excellent work replacing ridge tiles, repointing chimney and repairing flashing. Also fixed other broken tiles. Clean and tidy job. Would definitely recommend.”
NeilA plain observation list, with no interpretation in it. Where to stand, what order to scan the stack in, what each part of a chimney actually looks like from below, and what a phone camera will and will not show.
The single biggest improvement most people can make to their view of their own chimney is to walk further away from it. Standing under a stack gives you a steep foreshortened angle in which the head hides the faces and the faces hide the junction. From the far end of the garden, or better still from the pavement on the opposite side of the road, the whole stack stands clear against the sky and you can see its outline, which is where half the useful observations live.
An upstairs window is usually the best position available and it is the one people forget. A rear bedroom looking across at the back slope, or a landing window on a neighbouring house, puts you far closer to the height of the stack and takes the foreshortening out. If you are on friendly terms with the house opposite or behind, ask; on a terrace it may be the only way anybody sees two of the four faces at all.
Take binoculars if you have them. Anything from eight to ten times magnification turns a vague grey band into an identifiable joint, and a pair of binoculars will out-resolve almost any phone at that distance. Go out in bright overcast light rather than sunshine, because flat light shows colour and texture while hard sun throws the stack into silhouette and hides one face completely in its own shadow. Early morning and late afternoon light raking across the brickwork is good for showing relief.
One rule sits above all of that. Do not go up. Not onto the roof, not onto a flat roof over a bay to get nearer, and not up a ladder propped against the gutter. A chimney is at the highest and most exposed point of the building, the covering around it is brittle and often loose, and everything in this guide is meant to be done standing on the ground or looking out of a window.
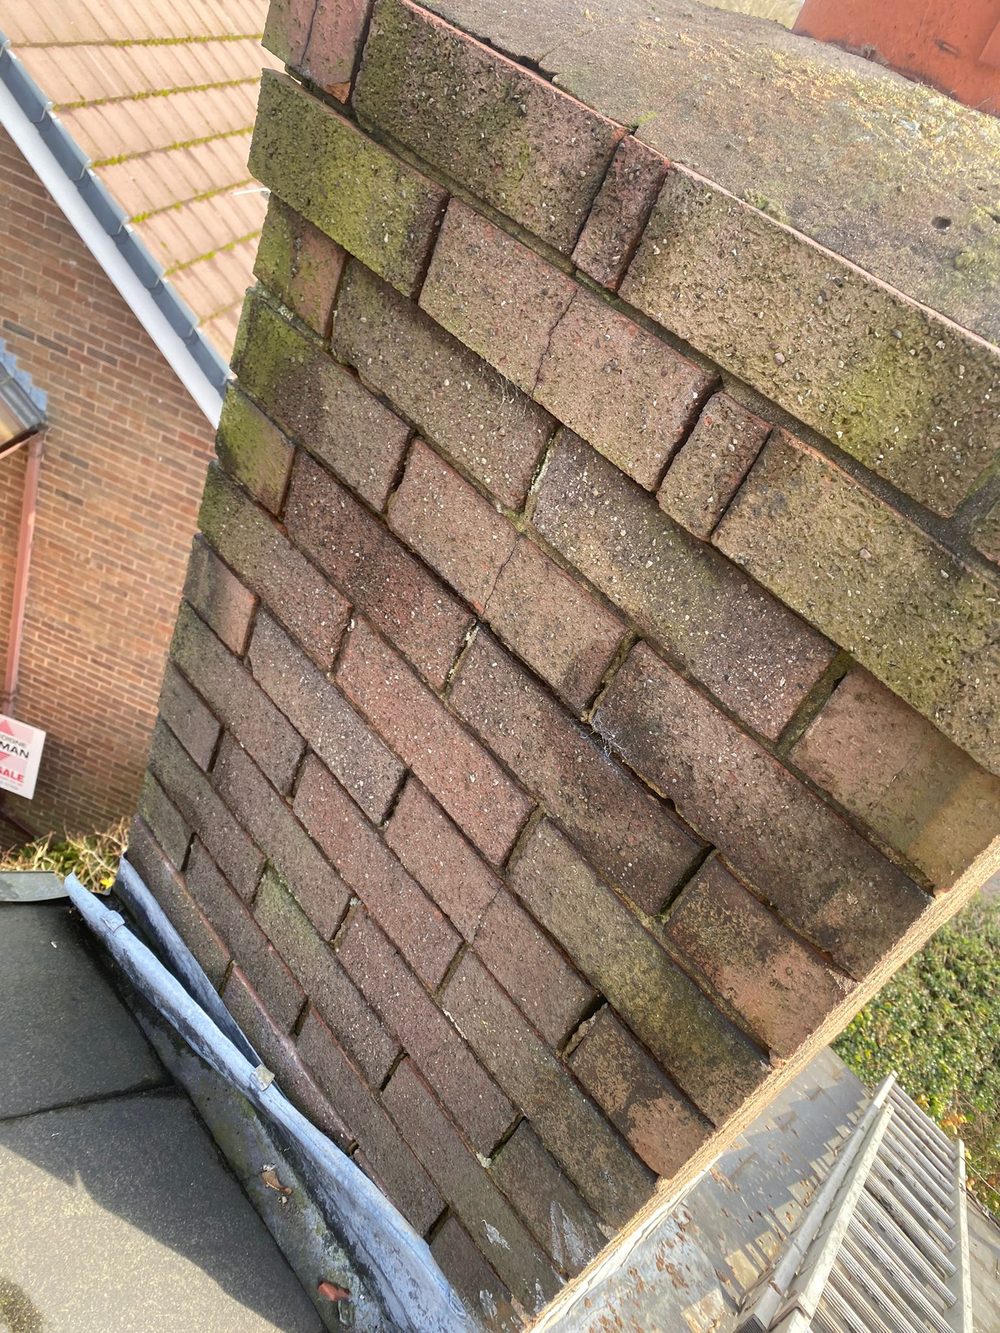
Photograph of our own work.
Work top to bottom and always in the same order, because a fixed route is what stops you noticing the obvious thing and missing the other four. The order is: the pots, the mortar bed the pots stand in, the head or coping, the four faces and their joints, the junction where the stack meets the roof, and finally the ground and the gutters underneath. Six passes, each one taking a few seconds.
Do the whole sequence from one position, then move and do the entire sequence again from a different direction. Resist the urge to move around chasing one detail, because that is how half a stack ends up unlooked at. Write each pass down as you go, in whatever words come naturally — the aim is a record, not a technical report, and “grey band along the bottom, cracked in a line” is a perfectly good note.
Note which compass direction each face looks towards while you are at it, even roughly. It costs nothing, the phone has a compass in it, and it is one of the first things anyone will ask you.
The pots are the clay cylinders standing above the top of the brickwork, usually terracotta red but sometimes buff or black, and plain, roll-topped, octagonal or moulded depending on when the house was built. What to record: how many there are, whether they all stand at the same height, whether they look upright when compared with each other and with the corner of the stack, and whether anything sits on or in any of them — a mesh cage, a metal cowl, a flat cap, a plastic hood, or a slab laid across the top.
The flaunching is the bed of mortar the pots stand in, spanning the whole top of the stack and sloping away from the pots towards the edges. From below it reads as a pale grey or buff collar. Record whether you can see cracks in it, whether there are pieces obviously missing around a pot base, whether it looks smooth and sloped or lumpy and flat, and whether there is moss, lichen or plant growth sitting on it. Some stacks have a flat stone or precast coping instead, which reads as a straight projecting lip all the way round.
The faces are the brickwork, and here you are looking at two things: the bricks and the lines between them. The horizontal lines are bed joints and the short vertical ones are perp joints. Record whether the lines look like thin flush lines or like dark shadowed grooves; whether any perps read as small black slots; whether the brick faces are flat and even or pitted, hollowed and lighter in patches; whether there is a band of different-coloured brick near the top; and whether the mortar lines stand out from the brick surface or sit back within it.
At the base, where the stack passes through the roof, there is either metal or mortar. Lead reads as a dull grey-white sheet, matt rather than shiny, sitting on top of the tiles or slates, and on the sloping sides it usually forms a staircase of small steps following the brick courses. Mortar reads as a continuous wedge or triangle in the angle, the same colour as the pointing, with no steps in it at all. Record which you appear to have on each side you can see, and record any line, crack or dark gap running along it.
What has come off a stack lands somewhere, and the somewhere is much easier to inspect than the stack. Look along the gutter below the slope if you can see into it from an upstairs window, look at the flat roof over a bay or a porch if there is one, and look at the path, the drive and the flower bed directly underneath.
What to record: lumps of grey mortar, fragments with a curved or moulded profile, thin flakes of brick face, loose sand, grit washed into a line by rainwater, or pieces of clay. Note the colour, because grey usually came from the head and red usually came from a brick. Note whether anything is sitting on top of moss and dust, which means it arrived recently, or whether it is bedded down into them, which means it has been there some time.
Look at the wall of the house under the stack as well. Record any staining, any vertical dark streak, any green algae growth in a band, and whether it lines up with anything above. Again, write it down rather than working out what it means.
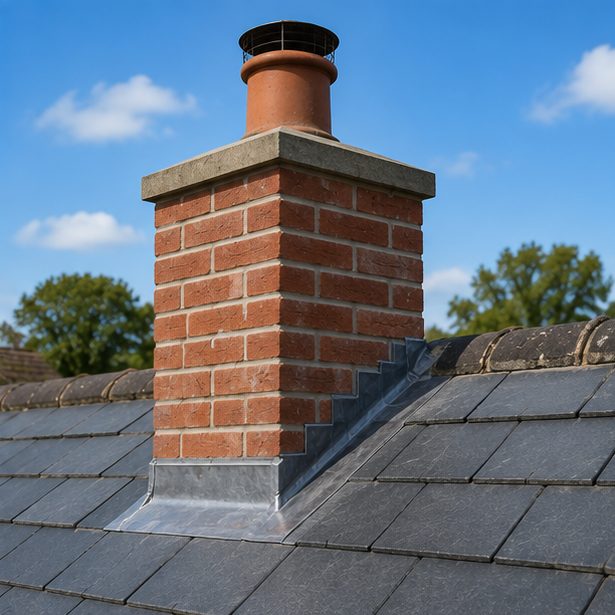
Image above is for illustration purposes only.
A modern phone is genuinely useful here, within limits that are worth understanding. The limit that matters is the difference between optical and digital zoom. Optical zoom uses a longer lens and gives you real extra detail; digital zoom crops the image and enlarges the remaining pixels, which adds size and no information at all. Most phones switch from one to the other part way along the zoom slider, often around three to five times, and everything beyond that point is enlargement rather than resolution.
The practical method is to shoot at the phone’s longest optical setting rather than dragging the slider to the end, hold the phone against a wall, a gatepost or a windowsill to steady it, tap the screen on the stack so it focuses and meters on the brickwork rather than the sky, and take several frames. Photograph the whole stack in its roof first for context, then the head, then the base, then the same three again from your second viewpoint. A slow video pan up the stack is a good supplement, because it shows the outline against the sky and any lean much better than a still.
What it will show reliably, with good light and a steady hand, is the shape and condition of the head, whether the pots stand in line, whether the mortar bed is broken, whether the base junction is metal or mortar, and whether the faces look even or patchy. What it will not show is anything on the far side of the stack, the back gutter behind it, the top of the head from above, the depth of any joint, or anything at all inside a flue. Nor can it tell you whether something is loose. That is not a failing of the camera; it is the reason somebody still has to put a scaffold up and look.
Send the pictures with a short note of what you saw in which order and from where. On this section of the site there is a separate guide on working out where water is getting in, which is where the interpretation belongs. This one is a list. Keep it as a list, and it will be worth far more to whoever reads it.
The rest of the series, on the questions people ask most.
Every town has its own page, written around the stacks that are actually on the roofs there. Start with the main chimney repairs page.
“Excellent work replacing ridge tiles, repointing chimney and repairing flashing. Also fixed other broken tiles. Clean and tidy job. Would definitely recommend.”
Neil“The guys did a great job in repairing our chimney. They were reliable, friendly and efficient. Buddy kept me in the loop throughout the whole process and I would not hesitate to use Roofline again!”
Hollie Furnival“Highly recommend. Very quick and efficient. Great communication. Went above and beyond to work the weekend to complete the work that needed to be done. Very happy with the results.”
Karen JonesDescribe what you can see and roughly where you are, and we will come back to you — usually the same day. If water is coming in now, please call instead.
Prefer to talk? Call 07464 259566 · WhatsApp 0044 7464 259566 · Email Evensbuddy@yahoo.com
We cover Chester, Cheshire, the Wirral and Flintshire from Elton, just north of Chester.
2 Manley View
Elton
Chester
CH2 4QF
Almost all of our work happens at your property rather than here, so please call before travelling.
Monday – Friday — 24hrs — Emergency Call-Outs
Saturday — 8:00 – 19:00
Sunday — 8:00 – 19:00
Weekday emergency call-outs are answered around the clock. Weekend cover is 8:00 to 19:00.