★★★★★
“Excellent work replacing ridge tiles, repointing chimney and repairing flashing. Also fixed other broken tiles. Clean and tidy job. Would definitely recommend.”
NeilRepointing is judged on how neat it looks and it should be judged on what it is made of. Here is what the mix has to do, what to ask before the work starts, and what to look at once the scaffold is down.
It helps to be clear what the job is, because the word suggests something more comprehensive than it is. When a wall is built, every brick is laid on a full bed of mortar that runs the whole way through the thickness of the wall. Pointing is not that. Pointing is the outer layer of that joint, the part exposed to the weather, typically the outer fifteen to twenty millimetres. Repointing rakes that layer out and replaces it, and leaves the original bedding mortar behind it exactly where it has always been.
That is the whole design principle of a solid masonry wall and it is worth stating plainly: the pointing is a sacrificial layer. It is supposed to wear out. It takes the rain, the frost, the salt and the movement, and when it has taken enough of them somebody rakes it out and puts a fresh layer in, which on a chimney means a scaffold and a couple of days. The bricks, which are expensive, difficult to match and structural, are meant to be left completely alone throughout.
On a chimney this arrangement is under more pressure than anywhere else on the building. A stack is exposed on four sides at once, it never has the benefit of an overhang, it is wet from outside and sooty from within, and it is at the coldest and windiest point of the roof. Whatever failings a mortar has will show up on a stack first and worst, which is why the choice of mix repays some attention there even if nobody thinks about it on a garden wall.
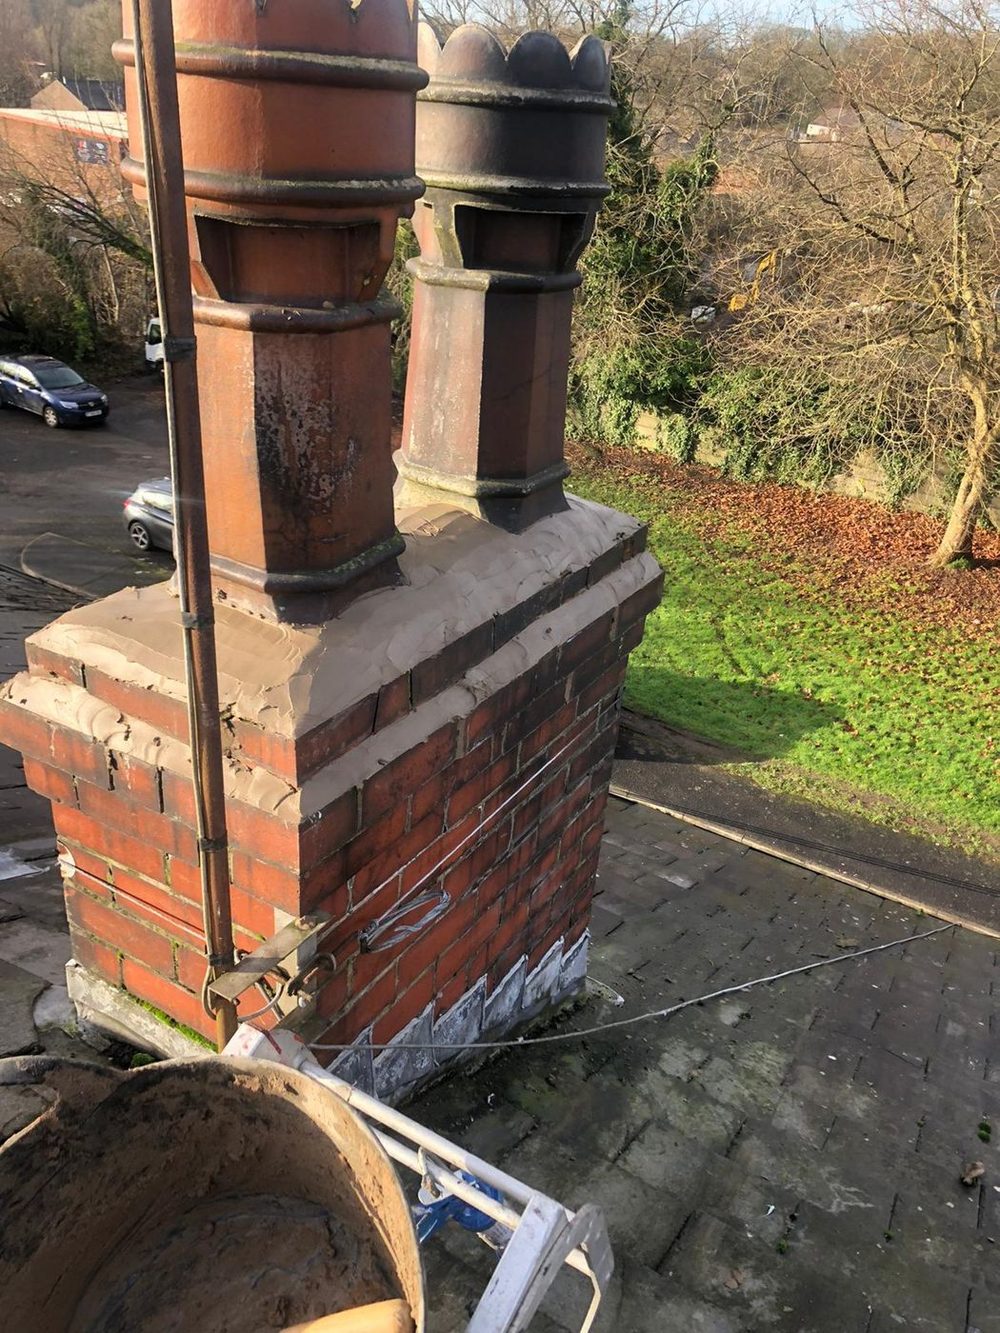
Photograph of our own work.
The governing principle of the whole subject is that the mortar should be the weaker of the two materials in the wall. Not the strongest mix available, not the hardest-wearing, not the one that sets quickest. Weaker than the brick it sits between. Everything else in this guide is a consequence of that one sentence.
The reason is about where the damage is allowed to land. A wall moves. It moves with temperature, with moisture, with the seasons and with small settlements in what it is standing on. That movement has to be taken up somewhere. If the joints are the weakest part, they take it, and a worn joint is an afternoon of work to renew. If the joints are stronger than the bricks, the bricks take it instead, and a brick that has lost its face cannot be repointed back into existence.
Water follows the same logic. Old brickwork is not waterproof and was never intended to be; it takes water in and gives it back out again, and the joints are a large part of the route by which it leaves. Fill them with a dense mix that water struggles to pass and the moisture in the wall has to find another way out, which means through the face of the brick. When that face is holding water and the temperature drops below freezing, the face comes off. The characteristic sight is a hard grey lattice of pointing standing proud of brickwork that has eroded ten or fifteen millimetres behind it, and the joints are still perfect, which is exactly the problem.
Nobody expects a householder to write a mortar specification, but asking what is going on the wall and why is entirely reasonable, and the shape of the answer tells you a lot. Mortars get described in two families. One is a gauged mix, given as parts by volume of cement, lime and sand — something like one, one and six, or one, two and nine, with the mix getting softer and more permeable as the lime goes up and the cement goes down. The other is a lime mortar proper, where a natural hydraulic lime does the binding instead of cement, graded by strength as NHL 2, NHL 3.5 or NHL 5.
Which of those suits your stack depends on the brick. A hard, dense, machine-made brick from the last fifty or sixty years will happily sit in a moderately cemented gauged mix. A soft handmade or early-pressed brick, which is what a great many older stacks around Chester and the Wirral are built from, wants far more lime and far less cement, and in some cases no cement at all. The test of a good answer is that it refers to your brickwork: the person quoting should be telling you that this mix has been chosen because the brick on your stack is soft, or hard, or in this or that condition.
Sand is worth a question of its own, because mortar colour comes almost entirely from the sand in it rather than from anything added afterwards. Choosing the sand gives a match that stays; a pigment gives one that fades in patches.
One exception is worth flagging, because people get told it is a contradiction. The flaunching on top of the stack is not pointing and does not follow the same rule. It is a fully exposed weathering surface with nothing over it, and it is normally mixed stronger than the wall joints. Being told that the joints are going in soft and the flaunching is going on harder is a sign that somebody knows what they are doing rather than a sign of muddle.
A joint has to be raked out to at least twice its width before new mortar goes in, which on a normal ten millimetre joint means fifteen to twenty millimetres of depth. Anything shallower gives the new mortar nothing to key into, and a thin skim of pointing across the face of a joint is held on by nothing but friction. It looks immaculate for a season or two, then lets go in sheets, and it frequently takes the arris of the brick with it on the way out.
How the raking is done matters as much as how far. Cutting a joint with a power disc is quick and it is unforgiving, because a disc that wanders takes the edge off the brick above and below and those marks are permanent. On soft old brickwork the joints are better cut by hand with a plugging chisel and a lump hammer, slower and with no scars. Once open, the joint is brushed out and damped down, because dry brick draws the water straight out of fresh mortar and leaves it as a powder that will never gain strength.
Deep joints go in more than one pass rather than being packed full in one go, each pass allowed to firm up before the next. And then the weather takes over. Fresh mortar will not cure in a frost and it will wash out in driving rain, and in hot sun it dries before it sets, which produces a joint that crumbles under a thumbnail. That is why pointing gets booked into settled spells and protected while it cures, and why a firm that tells you it will not point a stack in February is giving you a straight answer rather than an excuse.
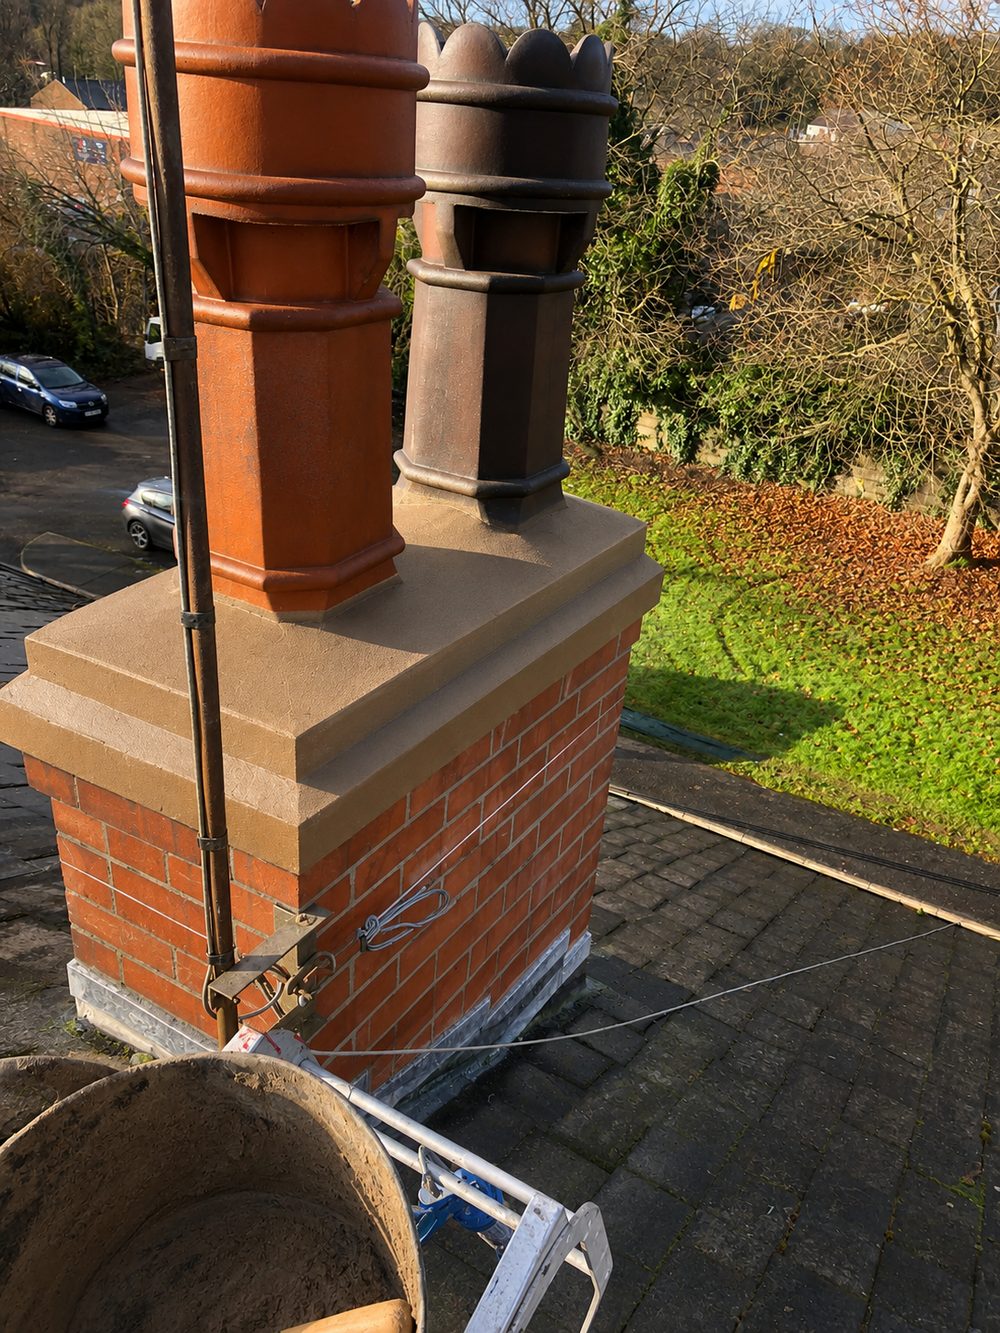
Photograph of our own work.
The profile is the part everybody discusses and it is the least consequential decision of the lot. A flush joint, finished level with the brick face, suits old soft brickwork and is what most stacks around here should have. A bucket-handle or a weatherstruck joint sheds water slightly better on hard modern brick. A deeply recessed joint looks striking and holds water on the ledge it creates, which is not what you want at the top of a roof. What matters far more than any of them is that the joint is full, properly compacted and finished against the arris rather than smeared across it.
Once the scaffold is down, the checking is done from the ground with binoculars or a zoomed phone, and not from a ladder. Look for mortar dragged out over the faces of the bricks, which on a photograph reads as the joints looking fatter than they were and the brick edges looking blurred. Look at whether the new work sits level with the brick face or stands off it. Look for fine hairline cracks running along the edge of the joint where it meets the brick, which means the mortar has shrunk away as it dried, usually because it was too strong or was worked too dry. And look at the colour when it is thoroughly dry, since wet mortar is always darker and nobody can judge a match on the day.
Then leave it alone and look again after a winter. Sound pointing in a suitable mix comes through a frost with nothing to show for it. Pointing that was too hard, too shallow or laid in the wrong weather starts to declare itself in the first cold spell, usually as fine debris on the path below the stack. If you want to understand what is landing there and what to watch for, the ground-level checklist covers it, and the main chimney repairs page sets out how the work itself runs.
The rest of the series, on the questions people ask most.
Every town has its own page, written around the stacks that are actually on the roofs there. Start with the main chimney repairs page.
“Excellent work replacing ridge tiles, repointing chimney and repairing flashing. Also fixed other broken tiles. Clean and tidy job. Would definitely recommend.”
Neil“The guys did a great job in repairing our chimney. They were reliable, friendly and efficient. Buddy kept me in the loop throughout the whole process and I would not hesitate to use Roofline again!”
Hollie Furnival“Highly recommend. Very quick and efficient. Great communication. Went above and beyond to work the weekend to complete the work that needed to be done. Very happy with the results.”
Karen JonesDescribe what you can see and roughly where you are, and we will come back to you — usually the same day. If water is coming in now, please call instead.
Prefer to talk? Call 07464 259566 · WhatsApp 0044 7464 259566 · Email Evensbuddy@yahoo.com
We cover Chester, Cheshire, the Wirral and Flintshire from Elton, just north of Chester.
2 Manley View
Elton
Chester
CH2 4QF
Almost all of our work happens at your property rather than here, so please call before travelling.
Monday – Friday — 24hrs — Emergency Call-Outs
Saturday — 8:00 – 19:00
Sunday — 8:00 – 19:00
Weekday emergency call-outs are answered around the clock. Weekend cover is 8:00 to 19:00.